I'm so excited to share with you guys the brave feat of painting that just took place in our kitchen, which Chris and I moved into in August. I was lucky enough to have the gracious folks over at Royal Design Studio contact me to see if I'd like to do a stencil review on Decorology. Uh....yeah! I instantly knew the effect I wanted to get, which is a sheen effect.
The inspiration for the look I wanted - a gloss/matte sheen effect came from photos I'd collected similar to the one below:
GORGEOUS!
via ?
So...here was our kitchen before...pretty standard for a 1 bedroom apartment in a building...
And...here is the kitchen after...
pretty drastic change right?
The stencil I selected was the
Large Marrakesh Trellis. Chris and I took a trip to Morocco two January's ago, and the tiles and ornate plaster work will leave your jaw on the floor. The stencil reminded me of the tours we took of
medersas in Fes and Marrakesh.
The stencil as featured on the Royal Design Studio site
An illustration of the stencil showing the registration marks and the scale.
The stencil also came with some instructions and stencil care information.
Once I received the stencil, and before setting off to paint - I did some research on how to achieve the look I wanted. Like most projects, prep work is key!
The Royal Design Studio site offers a lot of resources and tips for stenciling. I got the basics from their
Basic Stencil Techniques page for all over stencil patterns.
I knew to achieve the look I wanted I would need the same paint color, but in different sheens. I chose gloss and flat. Here's where I ran into a little issue. Once I got the stencil I realized that, if I put down the solid flat coat first, the way the stencil is cut, most of the wall would end up being gloss. I didn't want that because I was afraid the room would be too shiny. However, upon doing research and asking around, painting a solid base of the gloss and then painting the stencil in flat over the gloss wouldn't work either, because the matte paint would not adhere to the gloss painted wall. Hmmm...I was stuck.
So, being the extremely stubborn woman I am, I did a little more research and came across the talented Megan Bouton, who was the genius behind this wall treatment:
Check out her gorgeous dining room
here.
Just the look I wanted! So I wrote her asking what she did to get the matte paint to work over the gloss, and she was awesome enough to reply that she hadn't done anything special, and that even a year later she can't even scratch the matte off with her fingernail.
So, I decided to give it a try, and here is my process and results
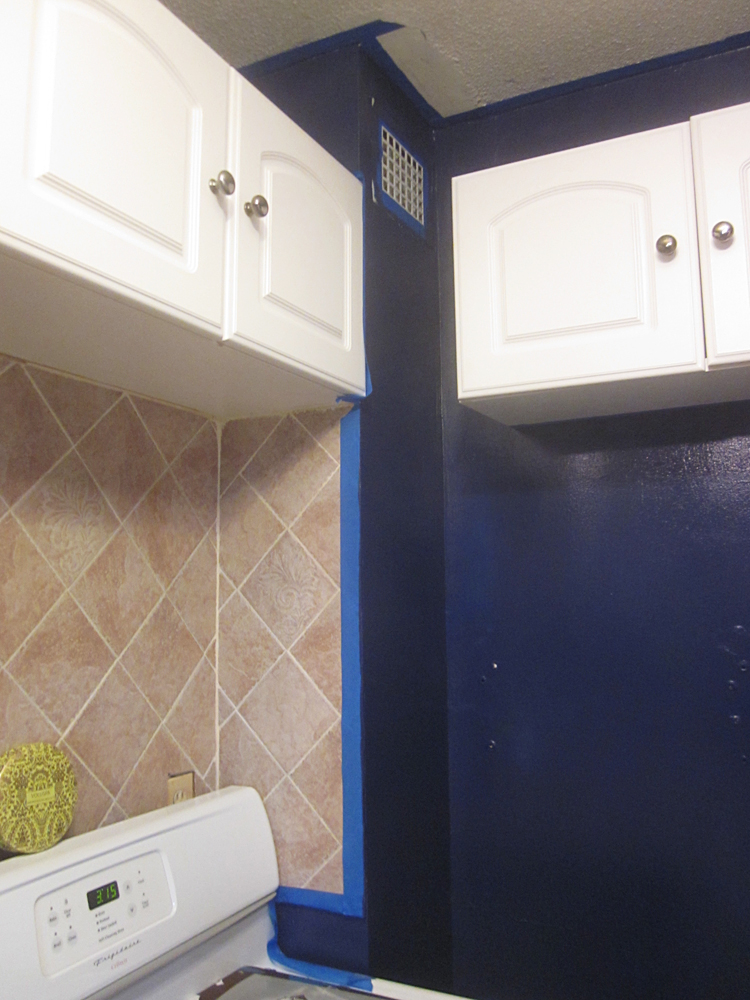
First, we covered the walls in a high-gloss navy called "Royal Hyacinth" from Olympic. I hadn't painted in high-gloss before, and it sure is shiny! It also required 3 coats to get everything of uniform "glossiness." You also need to work with a nice wet roller, because if it gets too dry it will just lift up the some of the paint you just put on - which is super noticeable the glossier your paint is. We also taped off the edges with a standard blue painters tape.
Some supplies you will NEED:
• stencil spray adhesive. Don't go with a general adhesive spray - that didn't work for me. Get a spray specifically for stencils at a craft or hobby store. Also - wear a mask when you work with it - it's not the most lung friendly stuff.
• level. very important for making sure you aren't taping the stencil up out of line.
• a small roller. If you are working with glazes and/or diluted paints use a stencil brush, which the folks over at Royal Design Studio recommend. I knew I'd never finish unless I used a roller. I used a brush for corners and touch-ups.
• painter's tape. Okay, I hate to diss a product, but the green tape pictured here - called Frog Tape, wasn't strong enough to hold up the stencil. I'm sure it's great for it's intended purpose, but it wasn't sticky enough for the Mylar stencil. I ended up using the traditional blue painter's tape.
• patience. Don't expect to finish this in the amount of time it takes to simply paint a room. The more care you take doing research, practicing, and lining up your stencil, the more beautiful the result will be.
Optional:
• a brayer: you can purchase at your crafts/hobby store. If helps press the stencil flat on the wall more quickly than using your fingers.
Also - I recommend practicing before you start stenciling, especially if you haven't done it before. I just used a large piece of cardboard.
Sorry the picture is so blurry. But whenever I moved the stencil I would line it up best I could and then check that it was level.
Once level I'd secure it with some tape so it lays flat. The flatter your stencil, the crisper your lines will be. Also notice how the stencil is now covered in paint? Since I was using undiluted latex, the paint would eventually make the registration marks impossible to see. So every now and then I'd let the paint on the stencil dry, and then I could peel it right off like a film. No water, soap, or scrubbing required.
A close up of the result, once dried.
Since it took me so long to finish the project, since I've been so busy at work, I never got that "wow" factor because I had been looking at it for so long before it was finished. I wish I could walk into it finished without seeing it before!
Mugs from our travels we keep in the glass cabinet. They don't coordinate, but they remind me of the places we've been.
Aren't these acorn squash pretty? They are from my parent's farm,
Chestnut Creek.
(The website is designed by your's truly)The matte paint over the gloss is surprisingly durable, though if you scrape it with something hard it does scratch, so I wouldn't recommend matte over gloss for places that see a lot of movement. It's also not as "scrubbable" as eggshell, semi-gloss, or gloss. Luckily we have a very large stone backsplash, and most of the cooking and what not only happens beneath the backsplash.
So, what do you think of my first stab at stenciling? I wish the color had been a little bit darker, but I'm happy with it. We still have a lot of work to do in the kitchen. I'd like to add a runner, organize our pantry, and fix the crooked cabinets. Since it's a rental, there's only so much we can alter.
Once again, many thanks go out to
Royal Design Studio.
Make sure you check back next week as I will be introducing a giveaway from Royal Design Studio, and I hope to reveal some of the DIYs I will be doing in the kitchen next week. I can give you a hint: it includes repurposing a piece of furniture to increase storage space, and another DIY that will allow you to gain the equivalent least an entire cabinet!
*disclosure: I received the stencil as a sample from Royal Design Studio